You know that feeling when you walk into a Pinterest-perfect home – the kind with spotless countertops, color-coordinated bookshelves, and a magically minimalist vibe?
Now, compare that to the reality of your kitchen counter right now.
That little pile of unopened mail (that you swear you’ll deal with later). The mystery mug collection that has somehow multiplied overnight. The charger that lives permanently on the table even though it has a drawer.
If you just looked around your room and sighed – trust me, you’re not alone.
Here’s the thing: Keeping a home tidy isn’t about constantly cleaning – it’s about creating a space that naturally stays clutter-free with less effort.
- A space that feels lighter, calmer, and easy to reset.
- A home where you’re not spending hours tidying up every weekend.
That’s why this 7-Day Home Refresh is different.
It’s not about spending hours scrubbing. It’s about small, easy shifts that make your home feel lighter, fresher, and easier to manage – without constant effort.
Stick around until the end for a free printable checklist to help you follow along!
P.S. If you haven’t read Spring Cleaning Made Simple: 3-Step Plan for a Clutter-Free Home, start there! This guide builds on those ideas to create a long-term refresh you can actually maintain.
Let’s do this – one simple reset at a time.
[Affiliate Disclosure: This post contains affiliate links, meaning I may earn a small commission if you make a purchase – at no extra cost to you. As an Amazon Associate, I earn from qualifying purchases. Every product is thoughtfully chosen to help you live a cozier, healthier, and more balanced life. Thanks for keeping the cozy vibes going!]
Day 1: The “Clarity Reset” – Seeing Your Home with Fresh Eyes
Have you ever walked into a hotel or Airbnb and immediately felt a sense of calm and relaxation?
It’s not just because it’s clean – it’s because everything has a place, there’s no visual clutter, and the space feels intentional.
But when you live in your own home every day, it’s easy to stop noticing the things that drain your energy.
Today, we’re not cleaning or decluttering. We’re simply seeing our space differently.
Step 1: The “Guest Walkthrough” – Seeing Your Home Like a First-Time Visitor
When you live in a space every day, your brain stops registering small messes (this is called “clutter blindness”). The fix? Walk through your home as if you were a guest visiting for the first time.
How to Do the “Guest Walkthrough”
- Step outside your front door. Take a deep breath.
- Walk back in as if you’ve never been here before.
- Notice the first things that catch your attention.
Ask yourself:
- What areas feel inviting?
- What areas feel cluttered or heavy?
- What’s the first thing you’d tidy or improve if guests were coming over?
Why This Works:
- Helps you identify high-impact areas (instead of obsessing over every small mess).
- Gives you clarity on what actually needs attention.
- Shifts your mindset from “I have to clean” → “I want to create a space that feels good.”
Step 2: The “Clutter Energy Map” – How Your Space Affects Your Mood
Certain spaces feel relaxing, while others feel draining. Your home has “high-energy zones” (places where clutter builds up) and “calm zones” (spaces that naturally feel peaceful).
How to Map Your Clutter Energy
- Go to the space in your home where you feel the MOST relaxed.
- Maybe it’s your bed, a cozy reading corner, or a sunlit kitchen table.
- What makes this space feel good? Is it clutter-free? Well-lit? Simple?
- Now go to a space that feels heavy, chaotic, or messy.
- What makes it feel that way? Too much clutter? Poor lighting? No organization?
- Compare the two spaces.
- What can you do to make your stressful space feel more like your peaceful space?
Why This Works:
- Helps you understand how your home affects your emotions.
- Makes decluttering feel personal, not just another chore.
- Helps you decide which areas to tackle first.
Step 3: Set Your “Feel-Good Space” Intention
Instead of thinking, “I have to clean,” shift your mindset to “I’m creating a home that feels good to be in.”
Ask yourself: How do I want my home to feel?
- Cozy & warm? (Soft lighting, fewer distractions, intentional decor.)
- Light & airy? (Clear surfaces, fresh scents, simple layout.)
- Organized & calm? (No clutter piles, everything has a place.)
Write down a sentence that describes the home you want to create. Example:
“I want my home to feel light, peaceful, and welcoming. I want to wake up and feel instantly relaxed in my space.”
Wrapping Up: Seeing Your Space with Fresh Eyes
Today, you didn’t clean or declutter – you simply saw your home differently.
- You noticed what feels good and what doesn’t.
- You identified where clutter is draining your energy.
- You set an intention for how you want your home to feel.
Day 2: Decluttering Made Simple – Find What Works for You
If you’ve ever tried to declutter but got stuck, felt overwhelmed, or ended up keeping way too much, you’re not alone.
The problem? Most people declutter the wrong way. They try to go through everything one by one, making endless decisions – which leads to decision fatigue and, ultimately, giving up.
But today, we’re flipping the approach and using a combination of science-backed decluttering methods that will help you clear space effortlessly – without regret.
Step 1: The 80/20 Rule – Why Most of Your Stuff Is Just Taking Up Space
The 80/20 Rule (Pareto Principle) states that 80% of results come from just 20% of effort.
When applied to decluttering, this means:
- You wear 20% of your clothes 80% of the time.
- You use 20% of your kitchen tools for 80% of your cooking.
- 80% of your clutter comes from just 20% of your belongings.
Instead of struggling to decide what to get rid of, focus on what you actually use.
Quick Challenge: Look around your home and ask:
- What’s taking up space but barely gets used?
- If I had to pack for a one-month trip, what would I actually take?
Want to dive deeper? Read these:
- The Life-Changing Magic of Tidying Up by Marie Kondo [Check Here]
- Goodbye, Things: The New Japanese Minimalism by Fumio Sasaki [Check Here]
Step 2: Choose the Right Decluttering Method for YOU
Not everyone can follow the 80/20 Rule strictly – some people feel guilty about letting go of things, others don’t know where to start. To make the process easier, here are several proven decluttering methods, allowing you to choose the one that fits your style best.
- The “Essential 20%” Method (For Those Who Want Instant Clutter Relief)
- Instead of choosing what to throw away, choose what to keep.
- Example: Pick your top 20% favorite clothes → donate or store the rest.
- Best for: Fast decluttering, minimalists, and people who want instant results.
- Try this: Choose one category (clothes, kitchen tools, or books) and pick your favorite 20%.
- The KonMari Method (For Those Who Struggle with Letting Go)
- Created by Marie Kondo, this method helps you decide based on emotions.
- Hold an item and ask: “Does this spark joy?” If not, thank it for its service and let it go.
- Best for: Sentimental people, those who feel guilty about decluttering.
- Try this: Choose five sentimental items and see if they still spark joy – or if it’s time to say goodbye.
- The “One-Year Rule” (For Those Who Keep Things “Just in Case”)
- Ask yourself: “Have I used this in the last year? Will I use it in the next year?”
- If the answer is no, it’s just taking up space.
- Best for: Clothes, beauty products, paperwork, and seasonal decor.
- Try this: Go through your wardrobe or bathroom products and apply the 1-Year Rule.
- The 20-10 Decluttering Method (For Those Who Get Overwhelmed Easily)
- Created by Rachel Hoffman, this method breaks decluttering into 20-minute bursts with 10-minute breaks.
- You don’t have to declutter everything at once – small, consistent efforts work better.
- Best for: People who get overwhelmed easily or have limited time.
- Try this: Set a 20-minute timer and declutter one space, then take a break. Repeat if needed.
Step 3: Solve the “Clutter Guilt” Problem (Let Go Without Regret)
One of the hardest parts of decluttering is feeling guilty about letting things go. Here’s how to reframe it:
- Sentimental Items: Keep the Memory, Not the Object
- Instead of holding onto old letters, gifts, or souvenirs just because, take a photo or create a memory box.
- Ask yourself: Do I love this item, or do I love the memory it represents?
- Expensive Purchases: The Money Is Already Spent
- Keeping something you don’t use won’t bring back the money you spent.
- Selling, donating, or gifting it gives it a second life.
- Try this: List one high-value item (like a designer bag or unused kitchen appliance) for sale or donation today.
- The “Probation Box” for Things You’re Unsure About
- Not ready to let go? Put items in a “Maybe” box and set a reminder in 30 days.
- If you don’t go back for them, you don’t need them.
- Try this: Create a “Probation Box” today for items you’re unsure about – seal it and set a reminder to check in a month.
- Smart Decluttering Aids
- Vacuum Storage Bags – Save sentimental clothes without clutter. [Check Here]
- Digital Photo Frame with Cloud Storage – Preserve sentimental memories without keeping physical clutter. Easily upload and display old letters, gifts, or keepsakes in a rotating slideshow. [Check Here]
- Label Maker with QR Code Feature – Perfect for organizing your “Probation Box” or memory storage. Scan the code to see what’s inside without opening the box! [Check Here]
Common Decluttering Mistakes (And How to Fix Them)
- Trying to declutter everything at once.
- Fix: Use one decluttering method per category – don’t mix approaches.
- Feeling guilty about throwing things away.
- Fix: Find better homes for them (donate, sell, or repurpose).
- Reorganizing clutter instead of removing it.
- Fix: Declutter first, then organize what’s left.
Key Takeaways: Decluttering in a Way That Works for You
- Today, you didn’t just declutter – you cut the excess in a way that works for you.
- You learned why most of your stuff is just taking up space.
- You applied a decluttering method that fits your personality.
- You let go of things without guilt – or at least put them in a “Probation Box.”
- Tonight, take one small action: Choose one category and apply a decluttering method from today’s list.
Day 3: The Kitchen Reset – Create a Clutter-Free, Easy-to-Maintain Space
Imagine stepping into your kitchen, ready to cook a warm, comforting meal – but instead, your counters are cluttered, the sink is full, and you feel overwhelmed before you even begin. Sound familiar?
A kitchen should be a place of nourishment and ease, but when it’s chaotic, it becomes just another source of stress.
Today’s reset isn’t about “deep cleaning.” It’s about transforming your kitchen into a space that works for you – one that makes cooking easier, not harder.
Step 1: The “Lighter, Brighter” Kitchen Shift
The way your kitchen looks and functions affects the way you feel in the space.
Why Does a Clutter-Free Kitchen Feel More Relaxing?
- Visual clutter = mental clutter. Your brain processes everything in your environment, even subconsciously. The more items you see, the more mentally overwhelming the space feels.
- Functional kitchens feel effortless. A study from Princeton Neuroscience Institute found that an organized space improves cognitive clarity, making it easier to focus, cook, and enjoy meals.
How to Create a Kitchen That Feels Lighter & More Functional
- Clear the Counters for Instant Mental Relief
- Keep only 3 essential appliances visible. Everything else should be stored away.
- Most-used items? Store in easy-access drawers or tiered storage racks.
- Smart Space-Saving Products That Help:
- Magnetic Fridge Organizer – Turns unused fridge space into an instant spice rack. [Check Here]
- Under-Cabinet Mounted Shelves – Doubles storage without adding clutter. [Check Here]
- Adjustable Pull-Out Cabinet Organizer – Turns deep cabinets into accessible storage. [Check Here]
- Follow the “Kitchen Work Triangle” for Better Flow
- Your stove, sink, and fridge should form a triangle – this layout minimizes unnecessary steps while cooking.
- Keep commonly used items near where you use them.
- Engage Your Senses to Make the Space Feel Inviting
- Soft under-cabinet lighting creates warmth.
- Fresh herbs in a small kitchen planter add life and freshness.
- A quiet mini air purifier keeps the air clean and fresh.
Step 2: The Decluttering Reset – Keep Only the Best
Not all clutter is obvious. Some items sit in drawers for years, taking up space just in case we might need them someday.
- The “Would I Cook with This Again?” Rule
Instead of keeping kitchen tools out of habit, ask yourself these three simple questions:- Would I cook with this again if I had an alternative? (If you always reach for one spatula, do you really need five?)
- Do I use this at least once a month? (Seasonal items aside, if it’s sitting untouched, it’s clutter.)
- Does this make cooking easier – or just take up space? (Single-use gadgets often add more mess than value.)
- Quick Fix: Open a drawer or cabinet and test this rule – see how much space you free up!
- The Minimalist Chef Approach
- The best kitchens don’t have the most tools – they have the best ones.
- Instead of 15 mugs, keep only the 4 that bring you joy and actually get used.
- Instead of single-use gadgets, invest in multi-functional tools that replace multiple items.
- Other Decluttering Rules That Work
Decluttering isn’t just about removing things once – it’s about preventing clutter from creeping back in.- The “One In, One Out” Rule – Every time you buy a new kitchen tool, remove one old item. This prevents drawers from overflowing with unused gadgets.
- The “90/90 Rule” (from Minimalism Experts Joshua Fields Millburn & Ryan Nicodemus) – Ask yourself:
- “Have I used this in the past 90 days?”
- “Will I use it in the next 90 days?”
- If no, it’s just taking up valuable space.
Step 3: The High-Impact Cleaning Reset – Small Efforts, Big Results
Instead of deep cleaning every inch, focus on these simple but effective cleaning habits.
The 3 Most Important Cleaning Tasks
- The Sink & Dish Area (The Key to an “Always Clean” Kitchen)
- A dirty sink makes the whole kitchen feel messy, even if everything else is clean.
- Adopting the “Wash as You Cook” habit prevents dishes from piling up.
- Quick Fix: Scrub your sink with baking soda & dish soap for a fresh reset.
- Game-Changing Cleaning Helpers:
- Over-the-Sink Drying Rack – Saves counter space, speeds up drying. [Check Here]
- Scrub Daddy PowerPaste – Cuts scrubbing time in half. [Check Here]
- Automatic Soap Dispenser (Touch-Free) – No more messy soap bottles on the sink! [Check Here]
- The Stovetop & Countertop Wipe-Down (The 30-Second Habit That Prevents Buildup)
- A quick wipe-down after cooking prevents buildup & keeps your kitchen feeling fresh.
- Using vertical storage keeps daily-use items accessible but clutter-free.
- Quick Fix: Spray & wipe your stovetop after every meal – it takes less than a minute!
- Best Storage & Cleaning Upgrades:
- Multi-Surface Degreaser (Best for Kitchen Grease) – Instantly removes grease without harsh scrubbing. [Check Here]
- Stainless Steel Cleaner Kit – Prevents streaks & buildup on appliances. [Check Here]
- Expandable Pan Organizer – No more stacking & unstacking heavy cookware. [Check Here]
- The Trash & Floor Refresh (The Secret to a Fresh-Smelling Kitchen)
- Even if your kitchen looks clean, a smelly trash can makes it feel dirty.
- Deodorizing this area keeps the space fresh.
- Quick Fix: Take out the trash & wipe the bin with disinfecting spray.
- Smart Cleaning Upgrades:
- Odor-Eliminating Trash Bags – Locks in bad smells & prevents leaks. [Check Here]
- Motion-Sensor Trash Can – Touchless & eliminates odors faster. [Check Here]
- Cordless Electric Mop – Effortlessly deep cleans floors in minutes. [Check Here]
Step 4: The Effortless Clean Routine – Keep It Fresh Daily
Decluttering & deep cleaning once is great, but how do you keep the kitchen feeling fresh every day?
The secret? Tiny habits that take 2-3 minutes but prevent mess from creeping back in.
- The “Cooking-Ready” Test (A Quick Mental Reset Before You Leave the Kitchen)
- Before walking away, ask yourself: “If I wanted to cook something right now, does my kitchen feel inviting?”
- If not, take 2-3 minutes to reset.
- Quick Fix: Make it a habit to never go to bed with a full sink. It’s the easiest way to ensure your kitchen always feels fresh in the morning.
- The 2-Minute Kitchen Close (Your Easiest Habit for a Perpetually Clean Space): Instead of letting dishes pile up or leaving clutter for the next day, try this simple 2-minute habit before bed:
- Put away everything on the counter.
- Wipe the sink & stove.
- Set up a small “morning coffee station” – so your day starts fresh.
- Small Tools That Help:
- Expandable Spice Drawer Organizer – Keeps spices accessible but hidden, reducing counter clutter. [Check Here]
- Under-Cabinet Sliding Organizer – Turns wasted space under the sink into functional storage. [Check Here]
- The “Sunday Edit” (5-Minute Weekly Declutter to Prevent Re-Cluttering): Even with daily habits, some clutter builds up. That’s why a quick weekly reset keeps things from spiraling.
- Pick one drawer, shelf, or cabinet.
- Remove anything you haven’t used in months.
- Donate or store what’s not needed.
- Game-Changing Tools for Staying Organized:
- Magnetic Knife Strip – Frees up counter space while keeping knives accessible. [Check Here]
- Multi-Purpose Storage Baskets – Perfect for keeping pantry or fridge items sorted. [Check Here]
Final Notes: A Kitchen That Feels Light & Functional
Minimalism isn’t about deprivation – it’s about making room for what matters.
- A clutter-free kitchen makes cooking easier, more enjoyable, and stress-free.
- A few smart upgrades can make a big difference in functionality and efficiency.
- A kitchen designed for flow makes everyday cooking feel effortless.
Tonight, take just ONE small action from this list. The change starts now!
Day 4: The Living Room Reset – A Space That Feels Effortless, Functional & Inviting
Your living room is the heart of your home – the place where you relax, connect, and unwind. But when it’s constantly messy, cluttered, or visually chaotic, it’s hard to fully enjoy the space.
Today’s reset isn’t about deep cleaning or making your living room look “perfect” – it’s about making it work better for you. A space that feels effortless to maintain, functional to use, and inviting to be in.
Step 1: The “Clutter Hotspot Reset” – Fix What Gets Messy the Fastest
Most of the mess in your living room builds up in just a few key areas. Instead of spending hours cleaning, start with the spots that create the biggest stress.
The 3 Biggest Clutter Hotspots (and How to Fix Them)
- The Coffee Table (The Drop Zone for Random Items)
- Remove junk mail, remote controls, half-burned candles, or random items that don’t belong.
- Keep only 3-5 intentional items (a tray, a plant, or a book).
- The “Would I Lounge Here?” Test:
- Would I want to relax here after a long day? (If not, what’s in the way?)
- Would I bring a friend into this space as it is? (If not, what’s the first thing I’d fix?)
- Would I re-buy this décor if I were designing this space from scratch? (If no, it might be clutter.)
- Smart Upgrade:
- Adjustable Nesting Tables – Space-saving design that can be rearranged for functionality or tucked away when not in use. [Check Here]
- Decorative Coffee Table Basket – Stylishly contains coasters, candles, or small items while keeping the surface clutter-free. [Check Here]
- The Couch & Seating Area (The Invisible Clutter Zone)
- Fold blankets, fluff pillows, and remove anything that doesn’t belong (laundry, chargers, notebooks).
- Use a hidden storage ottoman to keep throws, books, or kids’ toys out of sight.
- The “Would I Lounge Here?” Test:
- Would I feel comfortable sitting here right now? (If not, what small change would help?)
- Is this seating functional, or is something always in the way? (Extra pillows, cluttered armrests?)
- Best Hidden Storage Upgrade:
- Couch Armrest Organizer – Holds remotes, magazines, and small essentials within arm’s reach. [Check Here]
- Foldable Storage Ottoman – Doubles as extra seating while keeping blankets, books, or toys hidden. [Check Here]
- The TV Stand & Cable Chaos (The Mess No One Notices Until They Do)
- Hide cables, power strips, and gaming consoles to create a clean setup.
- Use cord management boxes or under-TV organizers.
- The “Would I Lounge Here?” Test:
- Is the TV setup visually clean or full of tangled cords?
- Would I re-buy this décor if I were setting up this space today?
- Best Cable Management Solution:
- Cord Management Box – Hides messy cables instantly. [Check Here]
- Under-TV Storage Shelf – Organizes remote controls, gaming consoles, or soundbars without taking up extra space. [Check Here]
- Self-Adhesive Cable Clips – Keep cords neatly aligned along walls or furniture without tangling. [Check Here]
Step 2: Functional Layout Fix – Does Your Space Work for You?
If your living room feels “off,” it’s probably because of poor furniture placement.
How to Improve Your Living Room’s Functionality in Minutes
- The “Pathway Test” – Can You Walk Through the Space Easily?
- Move through your living room as if you were a guest.
- Do you have to sidestep furniture? Are walkways blocked?
- Quick Fix: Shift one piece of furniture (even slightly) to improve flow.
- The “Conversation Setup” – Is Your Seating Arranged for Connection?
- Chairs should face each other naturally (not just the TV).
- Avoid placing all furniture against walls – pulling a couch slightly forward creates depth.
- Best Small-Space Seating Solution:
- Modular Sofa with Hidden Storage – A versatile couch that adapts to different layouts and offers hidden storage for blankets or books. [Check Here]
- 360° Rotating Coffee Table – A space-saving table with adjustable sections, allowing for flexible layouts and extra storage. [Check Here]
Step 3: The “Effortless Cleaning Touch-Up” – Quick Cleaning Steps That Make a Big Impact
Cleaning isn’t the focus of this reset, but a few small actions can instantly make your living room feel fresh.
- Vacuum high-traffic areas & shake out rugs to remove dust buildup.
- Wipe down coffee tables, side tables, and TV screens to get rid of smudges & dust.
- Use a handheld vacuum or fabric brush on couch cushions to refresh them.
- Quick Fix: Spend 5 minutes doing a surface refresh – just enough to reset the space.
Step 4: The 3-Minute Daily Reset (A Simple Habit to Keep It Clean & Organized)
The best way to keep your living room reset long-term is to spend 3 minutes tidying it daily.
- Reset Surfaces – Put away remotes, clear coffee table clutter.
- Straighten Seating – Fold blankets, fluff pillows, remove stray items.
- Do a “10-Second Scan” – Look around and remove one thing that doesn’t belong.
Reflections: Creating a Living Room That Feels Effortless
- Declutter where it actually matters – the biggest mess zones.
- Improve how the space functions – so it’s easy to move, relax, and entertain.
- Build a small daily reset habit – so you never have to start from zero.

Day 5: The Bedroom Reset – Transform Your Space into a True Sleep Sanctuary
Your bedroom should be your most peaceful space – a retreat from daily stress where you can fully relax, recharge, and sleep deeply.
But if your nightstand is cluttered, your closet is overwhelming, and your bed doesn’t feel inviting, your room might be working against you.
Today’s reset is all about creating a sleep-friendly space that feels effortless to maintain.
This isn’t just about decluttering – it’s about optimizing your bedroom for better rest, relaxation, and daily ease.
Step 1: The “Rest-First” Reset – Fix What Disrupts Your Sleep
Your bedroom should make rest feel effortless. But if your space feels chaotic or overstimulating, it’s affecting your sleep more than you think.
The 3 Biggest Sleep Disruptors (and How to Fix Them)
- The Nightstand Clutter Zone (The Last Thing You See Before Sleeping)
- A cluttered nightstand keeps your brain overstimulated before bed.
- Keep only 3 essentials: a lamp, a book, and one calming item (like a candle or plant).
- The “Would I Sleep Better Here?” Test
- Does my nightstand feel like a restful space – or a random dumping ground?
- Would removing one or two items make the space feel calmer?
- Quick Fix: Take one minute to clear your nightstand right now.
- Finishing Touch: Wipe down your nightstand & lamp base to remove dust (a clean surface makes a difference!).
- Smart Upgrade:
- Minimalist Bedside Organizer – Keeps essentials within reach without clutter. [Check Here]
- The Bed (Your Most Important Sleep Tool)
- Your bed is 90% of your sleep experience. If it’s uncomfortable or uninviting, it’s time to fix that.
- Upgrade your bedding if it’s scratchy, worn out, or traps heat.
- The “Would I Sleep Better Here?” Test
- Is my bed actually comfortable, or do I just deal with it?
- Would switching to softer, breathable bedding improve my sleep?
- Quick Fix: Fluff your pillows, straighten your sheets, and add one soft texture (like a throw blanket) for instant comfort.
- Finishing Touch: Shake out your blankets & vacuum your mattress to remove dust buildup (most people forget this step!).
- Best Bedding Upgrades:
- Cooling Bamboo Sheets – Temperature-regulating & ultra-soft. [Check Here]
- Weighted Blanket for Anxiety Relief – Encourages deep sleep. [Check Here]
- The “Screens & Stimulation” Trap (The Blue Light Problem)
- If you scroll on your phone or watch TV before bed, it’s keeping you awake longer.
- Instead of relying on screens, swap to a nighttime wind-down habit.
- Quick Fix: Create a “Screen-Free Wind-Down Zone”
- Keep your phone in a charging dock across the room.
- Replace TV time with a book, a journal, or soft lighting.
- Best Alternatives to Late-Night Scrolling:
- Hatch Restore Smart Alarm Clock – Simulates a natural sunset for better sleep. [Check Here]
- Soft LED Reading Light – Creates a gentle glow without harsh blue light. [Check Here]
Step 2: The Closet Clarity Reset – Organizing for a Stress-Free Morning
Your closet affects your daily routine more than you realize. A messy, overstuffed wardrobe makes mornings stressful and adds unnecessary decision fatigue.
The 3-Step Closet Reset
- The “Would I Wear This Again?” Test
- Instead of pulling everything out at once, go section by section.
- For each item, ask: Would I buy this today? Does it fit & make me feel good? Have I worn it in the past 6 months?
- Quick Fix: Pick 3 items from your closet you no longer wear and set them aside to donate.
- Finishing Touch: Vacuum your closet floor & wipe down the shelves – dust builds up more than you think!
- Best Closet Decluttering Trick:
- Space-Saving Velvet Hangers – Slim design that makes everything look neater. [Check Here]
- The “Capsule Wardrobe” Mindset
- Keep your most-worn, versatile items within easy reach.
- Use drawer dividers & closet organizers to create an effortless morning routine.
- Quick Fix: Organize one drawer or shelf today – keep only the essentials.
- Best Closet Organizing Tools:
- Adjustable Drawer Dividers – Instantly sorts socks, undergarments, or accessories. [Check Here]
- Hanging Closet Organizer – Perfect for pre-planning outfits. [Check Here]
- The “Set Yourself Up for Success” Routine
- Plan outfits for the week in advance to make mornings smoother.
- Designate a specific area for seasonal or special occasion clothes to keep everyday options simple.
- Quick Fix: Create a “grab-and-go” section with your go-to outfits.
- Best Closet Efficiency Boost:
- Over-the-Door Storage Rack – Extra storage for shoes, bags, or accessories without taking up space. [Check Here]
- LED Motion Sensor Closet Light – Instantly brightens your space for easier outfit selection. [Check Here]
Step 3: The Air & Light Reset – Set the Mood for Deeper Sleep
The air quality, scent, and lighting in your bedroom play a big role in how restful it feels.
- Freshen the Air
- Stale air makes a space feel heavy – open a window for instant refreshment.
- Add an air-purifying plant (like a snake plant or peace lily).
- Quick Fix: Open your window for 5 minutes – let in fresh air & reset the energy.
- Finishing Touch: Vacuum under the bed & dust hard-to-reach spots.
- Best Air-Quality Upgrade:
- Quiet Bedroom Air Purifier – Reduces allergens & improves sleep. [Check Here]
- Swap to Sleep-Friendly Lighting
- Overhead lighting is too harsh for winding down.
- Use warm, dimmable bedside lamps or LED candles instead.
- Quick Fix: Dim your lights an hour before bed – your body will naturally start relaxing.
- Best Soft Lighting for Sleep:
- Himalayan Salt Lamp – Soft amber glow that promotes relaxation. [Check Here]
- Set a Calming Scent (Your Brain’s Shortcut to Relaxation)
- Scent is directly linked to mood and memory – certain fragrances signal the brain that it’s time to unwind.
- Lavender, chamomile, and sandalwood are known to reduce anxiety, lower heart rate, and improve sleep quality.
- Use an essential oil diffuser for a subtle, long-lasting effect.
- Best Sleep-Enhancing Scent:
- Lavender & Chamomile Essential Oil Blend – Promotes deeper sleep. [Check Here]
Closing Thoughts: A Bedroom That Truly Feels Like a Sanctuary
- Declutter where it actually matters – your nightstand, bed, and closet.
- Make small changes that improve rest – better lighting, fresh air, calming scents.
- Light cleaning habits keep the space fresh without effort.
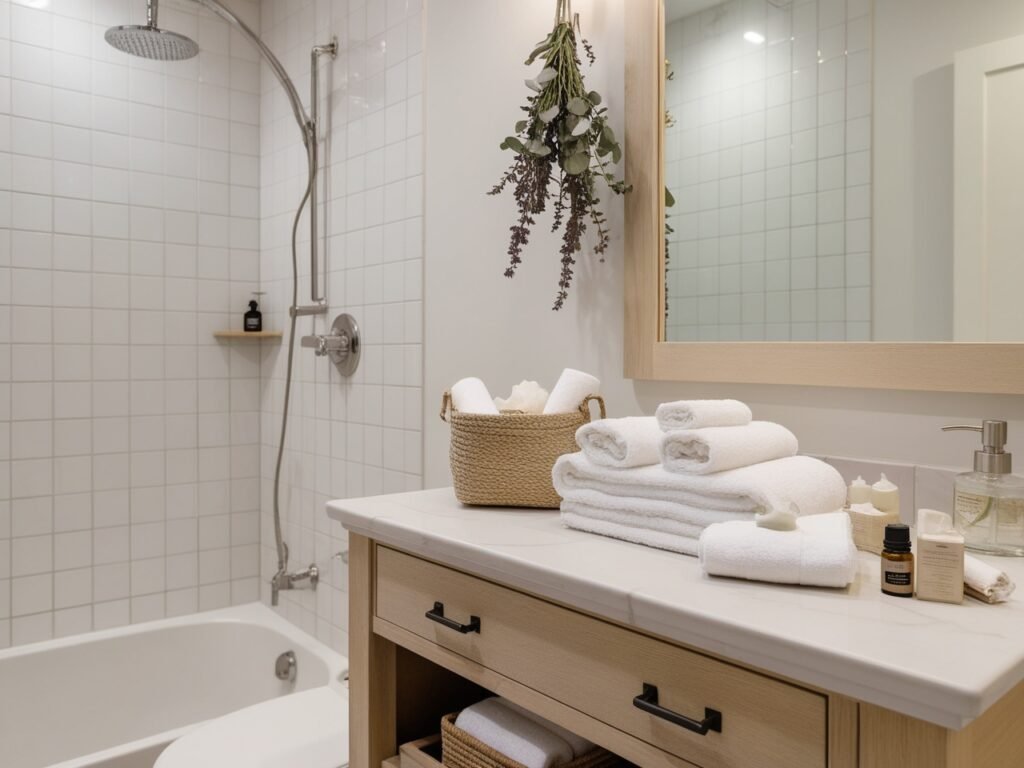
Day 6: The Bathroom Reset – A Fresh, Clutter-Free, and Effortlessly Clean Space
Your bathroom is one of the smallest yet busiest spaces in your home – but when it’s cluttered, messy, or in need of a deep clean, it can feel chaotic instead of calming.
Today’s reset isn’t about spending hours scrubbing – it’s about cleaning smarter, decluttering effectively, and adding simple touches that make your bathroom feel fresh, functional, and spa-like.
By the end of this reset, your bathroom will feel lighter, more inviting, and much easier to maintain.
Step 1: The “Declutter & Refresh” Reset – Clear Out the Chaos Before Cleaning
A clutter-free bathroom is easier to clean, use, and maintain. Instead of organizing things you don’t actually need, let’s remove the excess first.
The 3 Biggest Bathroom Clutter Zones (and How to Fix Them)
- The Countertop Overload (Messy Products Everywhere)
- If your bathroom counter is covered in skincare, hair tools, and random toiletries, it’s visually overwhelming and hard to clean.
- Keep only your daily essentials – everything else belongs in a drawer or organizer.
- The “Would I Use This Every Day?” Test
- Do I reach for this product daily? (If not, store it or toss it.)
- Is this something I actually love, or just something I’ve kept out of habit?
- Quick Fix: Take 2 minutes to clear your counter – keep only what you use daily.
- Finishing Touch: Wipe down the counter with an all-purpose cleaner for an instant refresh.
- Best Minimalist Countertop Organizer:
- Acrylic 2-Tier Bathroom Organizer – Keeps essentials neat without clutter. [Check Here]
- The “Too Many Products” Problem (The Cluttered Shower & Cabinets)
- Expired skincare? Old hair products? Half-empty bottles? They’re just taking up space.
- Group products by use (daily skincare, occasional treatments, backups) and remove what you don’t need.
- The “Would I Buy This Again?” Test
- Would I go out and purchase this product today? (If not, why keep it?)
- Has this been sitting unused for months? (If yes, let it go.)
- Quick Fix: Remove 3 products from your shower or cabinet that you haven’t used in months.
- Finishing Touch: Wipe down your sink & faucet – water spots and toothpaste buildup make the bathroom feel messier than it is.
- Best Shower Organization Upgrade:
- Rust-Resistant Hanging Shower Caddy – Keeps essentials within reach & prevents clutter. [Check Here]
- The Towel & Laundry Pile-Up
- Too many towels? Piles of clothes? Bathrooms can quickly become a second laundry room.
- Keep only 2-3 towels per person and store extras elsewhere.
- The “Would I Give This to a Guest?” Rule
- If I wouldn’t give this towel to a guest, why am I using it? (Upgrade worn-out towels!)
- Do I have more towels than I actually need? (Store, donate, or repurpose extras.)
- Quick Fix: Fold or hang all towels properly – a simple step that instantly makes the bathroom look tidier.
- Best Space-Saving Towel Storage:
- Over-the-Door Towel Rack – Maximizes small spaces. [Check Here]
Step 2: The Deep Clean Reset – Get a Sparkling Bathroom Without Wasting Time
Bathrooms get dirty fast – but a few smart cleaning habits can make them easier to maintain. Instead of a full-day deep clean, focus on quick, high-impact tasks.
The 4 High-Impact Cleaning Areas
- The Sink & Faucet (Where Grime Builds Up Fastest)
- Toothpaste splatter, soap scum, and water spots make sinks look dirtier than they are.
- A quick scrub once a week keeps it fresh.
- Quick Fix: Sprinkle baking soda & dish soap in the sink, scrub for 30 seconds, rinse.
- Best Sink Cleaner:
- Scrub Daddy PowerPaste – Non-toxic, deep-cleans without harsh chemicals. [Check Here]
- The Mirror & Glass Surfaces (Instant Brightness Boost)
- Water spots & streaks make the whole bathroom look dull.
- A quick wipe-down makes a huge difference.
- Quick Fix: Spray your mirror with vinegar & water – wipe with a microfiber cloth.
- Best Streak-Free Glass Cleaner:
- Invisible Glass Cleaner – Leaves mirrors crystal clear. [Check Here]
- The Shower & Tub (Prevention > Scrubbing)
- Soap scum and mildew build up fast if not maintained.
- A simple daily habit prevents deep scrubbing later.
- Quick Fix: After your next shower, spray the walls with a no-rinse shower cleaner.
- Best Shower Hack:
- Daily Shower Spray – Prevents soap scum buildup with no scrubbing. [Check Here]
- The Toilet (The Least Fun, But Most Important Task)
- A quick daily swipe prevents gross buildup.
- The secret? Keep toilet cleaner & disposable wipes nearby.
- Quick Fix: Swipe the toilet bowl with a toilet brush & cleaner – takes 30 seconds.
- Best Quick-Clean Toilet Tool:
- Clorox ToiletWand – Disposable, mess-free toilet cleaning. [Check Here]
- Lysol Click Gel Automatic Toilet Cleaner – No scrubbing required! Just stick a gel tab inside the bowl, and it continuously releases cleaner with every flush. Keeps your toilet fresh and stain-free effortlessly. [Check Here]
- Pumice Stone Toilet Cleaner – Removes tough stains, hard water rings, and mineral buildup without harsh chemicals. Perfect for deep cleaning while being eco-friendly. [Check Here]
Step 3: The Spa-Like Reset – Create a Calm & Refreshing Space
A bathroom isn’t just a place to get ready – it can feel like a mini spa when designed right.
3 Simple Ways to Upgrade Your Bathroom’s Atmosphere
- Bring in Natural Elements
- Plants improve air quality & add life to small spaces.
- A small succulent, aloe vera, or hanging pothos thrives in bathrooms.
- Quick Fix: Add one small plant to your bathroom – instantly makes it feel fresher.
- Best Low-Maintenance Bathroom Plants:
- Self-Watering Planters – Keeps greenery alive with minimal effort. [Check Here]
- Swap to Soft, Relaxing Lighting
- Bright fluorescent lighting feels harsh and uninviting.
- A warm, dimmable LED bulb softens the space and creates a calming vibe.
- Quick Fix: Swap out one harsh lightbulb for a softer, warmer option.
- Best Soft Lighting Upgrade:
- Motion Sensor Night Light – Gentle glow for nighttime use. [Check Here]
- Add a Signature Scent
- Certain scents (eucalyptus, lavender, citrus) create a refreshing, spa-like atmosphere.
- A reed diffuser or essential oil mist makes the space feel clean & inviting.
- Quick Fix: Add one calming scent (a candle, diffuser, or essential oil mist) to your bathroom.
- Best Calming Bathroom Scent:
- Eucalyptus & Citrus Essential Oil Blend – Naturally refreshing. [Check Here]
Last Look: A Bathroom That Stays Fresh & Clutter-Free
- Declutter what you don’t use – expired products, old towels, and counter clutter.
- Use smart cleaning habits to keep your bathroom fresh effortlessly.
- Add small upgrades – better lighting, scent, and a touch of greenery.
Tonight: Try just ONE reset from this list – your future self will thank you!
Day 7: The Entryway Reset – A Clean, Clutter-Free, and Inviting First Impression
Your entryway is the first and last space you interact with daily.
- If it’s cluttered, walking in can feel stressful instead of soothing.
- If it’s functional & tidy, leaving the house feels effortless, and coming home feels like a reset.
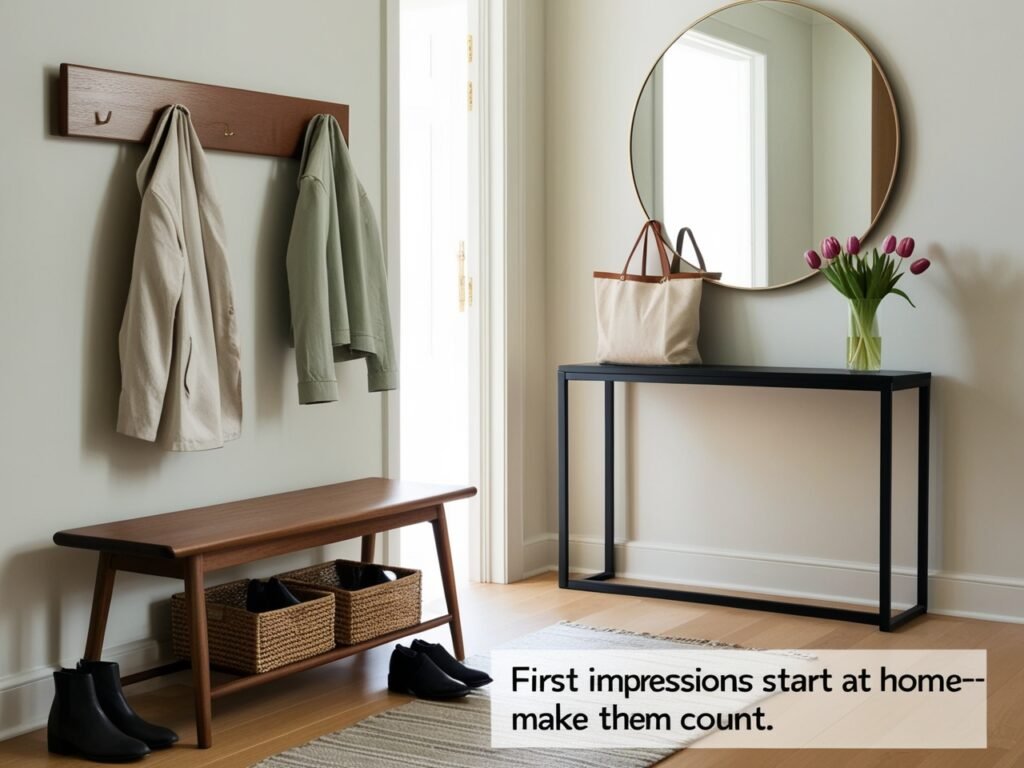
Today’s reset is about creating a welcoming, clutter-free, and clean entryway – one that sets the tone for your entire home.
Step 1: The “Declutter & Streamline” Reset – Remove the Chaos Before Cleaning
Before deep cleaning, remove clutter first. A clean entryway should feel open, functional, and calming – not like a storage zone for random stuff.
The 3 Most Common Entryway Problems (And How to Fix Them)
- The “Drop Zone” Mess (Shoes, Bags & Jackets Everywhere)
- If your entryway collects everything from shoes to mail to random clutter, it’s time to define a dedicated space for each item.
- Limit shoes to the 3 pairs you wear most often – everything else should be stored away.
- The “Would I Need This Every Day?” Rule
- Do I actually use this daily, or is it just piling up?
- Would storing it elsewhere make my space feel lighter?
- Quick Fix: Remove at least 2 pairs of shoes or one bulky jacket to instantly free up space.
- Finishing Touch: Wipe Down & Sanitize
- Dust the shoe rack & coat hooks – these spots collect hidden dust.
- Disinfect doorknobs & light switches – they’re high-touch areas people forget to clean.
- Best Entryway Organizer:
- Slim Shoe Rack with Coat Hooks – Keeps everything in one streamlined spot. [Check Here]
- The “Where Did I Put My Keys?” Problem
- Keys, wallets, sunglasses, and small essentials should have a dedicated home.
- A wall-mounted organizer or key bowl near the door prevents last-minute searching.
- Quick Fix: Create a dedicated “last-minute grab” zone near the door – one spot for keys, wallets, and sunglasses.
- Finishing Touch: Clean Small Surfaces
- Wipe the key holder & entryway table – dust & fingerprints build up quickly.
- Shake out or wash the entryway mat – it traps dirt from shoes.
- Best Quick-Grab Organizer:
- Wall-Mounted Key Holder & Mail Organizer – No more misplaced keys. [Check Here]
- The “This Space Feels Cold & Unwelcoming” Issue
- A plain, empty entryway lacks warmth.
- Simple additions like a mirror, soft lighting, or a small plant make it feel inviting.
- Quick Fix: Add one cozy element – a rug, a plant, or a small decorative touch.
- Finishing Touch: Sweep or Vacuum the Floor
- Entryways collect the most dust & dirt – a quick sweep makes a huge difference.
- Best Small Space Upgrade:
- Minimalist Entryway Mirror – Reflects light, makes the space feel bigger. [Check Here]
Step 2: The Functional Flow Reset – Make It Work for Your Daily Life
The best entryways aren’t just tidy – they’re designed for smooth exits & stress-free returns.
The 3 Key Zones for a Functional Entryway
- The “Drop & Go” Station (A Landing Zone for Daily Essentials)
- A small console table, tray, or shelf prevents things from getting lost.
- Keep it simple – just a dish for keys, a hook for bags, and a small space for mail.
- Quick Fix: Clear off your entry table or shelf – keep only what’s useful.
- Best Small-Space Entryway Table:
- Slim Console Table with Storage – Perfect for small spaces. [Check Here]
- The Shoe & Coat System (Prevent Piles from Forming)
- If shoes and coats are constantly in the way, it’s time for a system.
- Use a shoe bench, hooks, or a small rack to keep things neat.
- Quick Fix: Limit entryway shoes to 3 per person – store the rest.
- Best Space-Saving Entryway Storage:
- Multi-Level Shoe Bench with Hidden Storage – Doubles as seating. [Check Here]
- The Out-the-Door Essentials Zone (Make Mornings Easier)
- Create a “grab-and-go” station with items you need every day (umbrellas, tote bags, sunglasses).
- A small basket or wall hook works great.
- Quick Fix: Pick one thing that always goes missing in your entryway – give it a permanent spot today.
- Best Entryway Grab-and-Go Organizer:
- Hanging Wall Organizer with Pockets – Holds sunglasses, masks, and small essentials. [Check Here]
Step 3: The “Weekend Entryway Refresh” – Keep It Effortlessly Clean
Entryways collect dust & dirt faster than any other part of the home. Instead of letting mess build up, try a weekly refresh.
- Shake Out the Welcome Mat – This traps most of the dirt from outside.
- Wipe Down High-Touch Areas – Clean doorknobs, light switches, & key trays.
- Quick Sweep or Vacuum – The entryway floor collects dust daily.
- Quick Win: Try this 5-minute refresh every weekend – your future self will thank you!
Parting Words: An Entryway That Welcomes You Home
- Declutter what you don’t use – shoes, jackets, keys, and random items.
- Create a simple system – so everything has a home.
- Add small, cozy upgrades – a mirror, lighting, or a touch of greenery.
- Use effortless habits – so your entryway stays tidy without effort.
Free Home Refresh Printables – Your Secret Weapons for a Lighter, Cozier Space
Let’s be honest – sometimes, cleaning checklists feel like a never-ending to-do list of doom. But this? This is different.
These printables are designed to make home refreshes feel fun, low-effort, and (dare we say?) actually enjoyable. Whether you love a structured plan or prefer to keep things spontaneous, there’s something here for you!
- The 7-Day Home Refresh Checklist – Because Your Space Deserves a Fresh Start
A room-by-room guide that helps you refresh your home in small, satisfying steps. No deep-cleaning marathons, no stress – just easy resets that make a big impact. - The “Declutter in 10 Minutes” Cheat Sheet – Tiny Efforts, Big Wins
Not ready for a full-on decluttering session? No problem. This cheat sheet is packed with fast, 10-minute tasks that deliver instant results. Think of it as the snackable version of decluttering. - The Cozy Home Reset: A Fun, Mood-Boosting Challenge
Not into schedules? Make it a game! This challenge lets you randomly pick a task, shake things up, and refresh your space without overthinking it. A little surprise, a lot of cozy vibes.
Think of these printables as your personal home refresh sidekicks – always there when you need a quick win, a fresh start, or just an excuse to finally tackle that cluttered corner. Download now and see for yourself!
Final Thought: A Home That Supports the Life You Want
A home reset isn’t just about decluttering or making things look nice – it’s about creating a space that supports how you want to live and feel every day.
Think about it: The way your home looks and functions affects everything from your energy levels to your mental clarity to even how you start and end your day. A cluttered, chaotic space can feel draining, while a lighter, intentional home makes room for more ease, creativity, and calm.
But resetting your space isn’t a one-time event – it’s a shift in the way you interact with your home. It’s about designing your environment to work for you, not against you. Whether that means having a dedicated cozy reading nook, a kitchen that makes cooking feel effortless, or an entryway that welcomes you with a sense of calm – every small choice shapes how you experience your space.
So as you move forward, think about this: What kind of home makes you feel your best? What’s one small change you can make today that will bring you closer to that?
And if the mess in your home felt overwhelming, chances are your mind could use a reset, too.
Up next: A reset that goes beyond physical spaces – focusing on clearing mental clutter and refreshing the mind. Because clutter isn’t just physical – it’s the thoughts, stress, and emotional baggage that take up space in your head. In this next guide, we’ll explore how to release what’s weighing you down so you can feel lighter in every way.

